Let’s make a series of entries in which we’ll create an application with Angular 8 and Firebase. The application will be a ToDo App, that is, a task manager app. It will use the Cloud Firestore database, and Firebase Authentication for the login system.
Related entries
- Introduction <– You are here
- Configuring Firebase and Bootstrap in Angular. Understanding Cloud Firestore
- Creating our first component – Click event
- Our first reactive form
- Saving and reading data in Cloud Firestore – ngIf and ngFor
- Introduction to Routing
- Login system with Angular and Firebase
- Releasing our Angular App in Azure with VS Code
As I publish the articles, I will be placing the links here above☝.
Introduction
Angular is a framework that helps us develop modern applications for the web, mobile and desktop. To develop Angular applications, we use the Angular CLI.
The Angular CLI, or Angular command-line interface, is a tool that allows us to perform common angular tasks from a command-line interface. With this we can create a project, publish it, run the unit tests, create elements of an angular application, among other things.
The first thing we need is to install nodeJS (from now on we will simply call it Node). We need it to use the NPM or Node Package Manager, which allows us to install Node packages. And it is through this tool that we will install the Angular CLI in our pc. The Node version that I am going to use for this is 10.13.0. You can get node from this page: https://nodejs.org
Note: I recommend the LTS version, because it is the most stable.
After having installed node, go to a terminal and run the following command:
npm –v
You should get the version of NPM that was installed when you installed node. Now, we are going to install the Angular CLI, which will help us create a project from scratch. In the terminal, type the following command:
npm install -g @angular/cli
This command installs the Angular CLI globally, so that it is available in all the projects of your PC.
Let’s then create a our application in Angular. The goal of this application is that we get a general overview of some of the essential features of Angular.
The application that we will create is a ToDo application. Users can enter the application, view their tasks, enter new tasks and edit those tasks. These tasks will be stored in a database in Firebase, specifically, in a Cloud Firestore database. In addition, users can log in to our application. This is important, so that each user sees only their tasks, not the tasks of others. We’ll talk about this in another post, for now, let’s create our project.
Since we have the Angular CLI installed, we are going to use it to create our project. In the terminal, go to the directory where you would like to place your project. To create the project, let’s execute the following command:
ng new angular-todo
We are going to be asked if we want to have routing. Routing allows us to have something like different screens in our application to which we can navigate to (routing is useful for much more, we go deeper into this in a future entry). We are going to say yes. Another option is what kind of styles to use, whether CSS, LESS, SASS, etc. I’m going to choose CSS. With this the project will be created, it is normal that this takes a few minutes.
Let’s execute the project. From the terminal execute the following:
cd angular-todo
ng serve -o
The ng serve command compiles and publishes our app, so that we can access it from a browser. The -o opens the app immediately in your default browser:
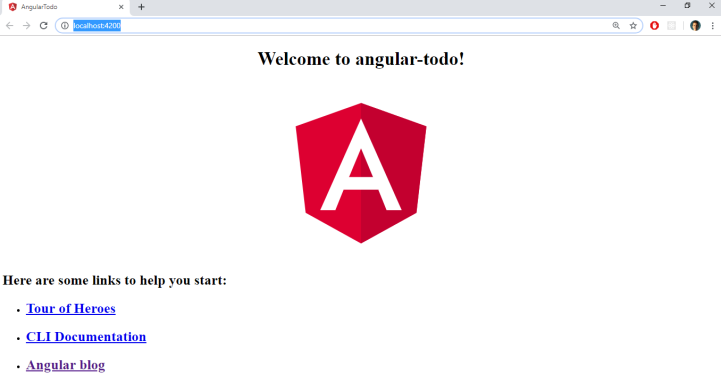
By default, the URL of our project is http://localhost:4200/
We are going to open the project with Visual Studio Code (VS Code). If you do not have Visual Studio Code, you can use any text editor to work, however, if you have not used it, I advise you to try Visual Studio Code, because it makes the development experience very pleasant, and we will use it when we decide to publish this application in Azure.
VS Code works for Windows, Linux and Mac. You can get it from this link: https://code.visualstudio.com/
After installing VS Code, at the terminal, press Ctrl + C to stop running the Angular application, and execute the following command:
code .
This will open your project with Visual Studio Code.
Now, what we are going to do is talk briefly about some of the parts that make up an Angular project. I will not abound too much of this topic in this entry, because later we will talk about all the parts of a typical angular application.
The first thing we will see is a component. What is a component? A component is a class decorated with the component decorator, attached to a template. In simple terms, a component is a part of your application which can define behavior and that the user can see on the screen.
Here, inside the app folder, we have an example of a component, the app component:

We can see that this component is divided into several files, one that is of html extension, which is the visual part of the component, we also have a file that has a component.ts extension, which is where the decorator component is located.
This file contains hidden or bidirectional Unicode text that may be interpreted or compiled differently than what appears below. To review, open the file in an editor that reveals hidden Unicode characters.
Learn more about bidirectional Unicode characters
| import { Component } from '@angular/core'; | |
| @Component({ | |
| selector: 'app-root', | |
| templateUrl: './app.component.html', | |
| styleUrls: ['./app.component.css'] | |
| }) | |
| export class AppComponent { | |
| title = 'angular-todo'; | |
| } |
The decorator is this @Component, inside this decorator we define the metadata of the component, in which we place the configuration of the component.
For example, here we have the configuration of the location of the template in the templateUrl property, which is where we say where the HTML of this component is, here we can see that the URL of the template is ./app.component.html. When we speak of a template, we refer to the visual part of the component.
The reason that we put ./app.component.html starting with ./ is to indicate that the file we are searching for is in the same directory as our app.component.ts.
In addition, in this decorator we can see that we have the styleUrls property where we define the stylesheets that are going to be applied on this component. In our case, we have the stylesheet ./app.component.css.
We see that the decorator is placed on top of a class, in this class we can define the functionality of our component. For example, if we have a button on the screen, and we want to run a piece of functionality when the button is clicked, then in this class we can place this functionality. We will see an example of this later.
So, we repeat, a component is a class, decorated with the @Component decorator, and that has a defined template. The decorator @Component defines the metadata of the component, and the template is the visual part of the component.
Let’s see the template of this component, that is, the app.component.html file. Here we see the HTML of what we saw earlier in Google Chrome, we can see the logo of Angular and some links. Something interesting that we can observe is a line of code that says:
Welcome to {{ title }}!
What do the double curly braces {{ }} mean? This is called interpolation, and it serves to evaluate JavaScript expressions in our HTML. The main use of this is to be able to place the value of an expression or variable in our HTML. So, in the previous case, what is done is that where it says {{ title }} is replaced by the value of the variable “title” that is in the class of the component. Although we can use certain JavaScript expressions in interpolation, we can not do everything there.
Note that the HTML of the app.component.html file does not have the html tag, nor does it have the head or body tag, the reason for this is that a component represents a part of your application. This HTML is going to be placed inside your page. Where? Well, for that we’re going to see the Index.html file:
This file contains hidden or bidirectional Unicode text that may be interpreted or compiled differently than what appears below. To review, open the file in an editor that reveals hidden Unicode characters.
Learn more about bidirectional Unicode characters
| <!doctype html> | |
| <html lang="en"> | |
| <head> | |
| <meta charset="utf-8"> | |
| <title>AngularTodo</title> | |
| <base href="/"> | |
| <meta name="viewport" content="width=device-width, initial-scale=1"> | |
| <link rel="icon" type="image/x-icon" href="favicon.ico"> | |
| </head> | |
| <body> | |
| <app-root></app-root> | |
| </body> | |
| </html> |
Notice that in this file we have our html, head and body tags, and notice that inside the body we have this strange tag that is called app-root. What is this?
Well, this is a directive in which the content of our app component will be placed. What is a directive? Directives help us change the appearance or behavior of HTML elements. The idea is that a directive is useful for several things, such as:
- Place components on the screen (which is what app-root does, place the app component on the screen);
- allows us to hide HTML elements dynamically,
- we can perform iterations within the HTML using directives.
We’ll talk more about this in a future entry. For now, let’s go back to our app-root directive, which initialize the app component.
When we place the app-root directive, the component is displayed on the screen, so that the user can visualize and use it. The reason that we use “app-root” to invoke the app component, is because in the metadata of the component, that is, in the decorator @Component that is in the app.component.ts, we have the selector property whose value is app-root We can change replace the value app-root for app-raiz (raiz is root in spanish), and we will see that the application will give us an error. If you are not already running the application, you can open a terminal in VS Code (Terminal> New terminal) and run the command again:
ng serve -o
The good thing about using the terminal or console of VS Code is that you can have several terminals open simultaneously.
We see that our application throws an error (you can see it in the Chrome console by pressing F12). To fix it, we can go to the index.html, and change the app-root directive by “app-raiz”, and we will see that the application works again in Google Chrome.
We already know what a component is, and what is a directive. Now we will briefly see what it is that controls everything: The module. A module is a class with a decorator @NgModule. In a module we place a set of elements that said module will handle, among other things. An application can have several modules, and one module can reuse the functionality implemented in another module. An example of a module is in the app.module.ts file:
This file contains hidden or bidirectional Unicode text that may be interpreted or compiled differently than what appears below. To review, open the file in an editor that reveals hidden Unicode characters.
Learn more about bidirectional Unicode characters
| import { BrowserModule } from '@angular/platform-browser'; | |
| import { NgModule } from '@angular/core'; | |
| import { AppRoutingModule } from './app-routing.module'; | |
| import { AppComponent } from './app.component'; | |
| @NgModule({ | |
| declarations: [ | |
| AppComponent | |
| ], | |
| imports: [ | |
| BrowserModule, | |
| AppRoutingModule | |
| ], | |
| providers: [], | |
| bootstrap: [AppComponent] | |
| }) | |
| export class AppModule { } |
Here we can see that we have a class and the decorator @NgModule on top of it. In this decorator we place the components that the module will handle, notice that here we have our AppComponent (in the declarations property). In the imports property we can import other modules. As I said, we can import modules to take advantage of the functionality declared on them. Here we can see that we have the BrowserModule, which is an Angular module which gives us a set of basic functionalities to work with.
Well, now that we have a general look at some of the parts of a typical Angular application, let’s start working. We need to see what services and pipes are, but we will see them during the development of the application.
Summary
- The Angular CLI is an essential tool for Angular development. It allows us to create, develop, test and publish Angular apps.
- A component is a class decorated with the @Component decorator.
- A component can define functionality (in the class) and has a visual part (the template)
- A directive allows us to add custom functionality to HTML
- A module holds everything together. Every Angular app needs at least one module.
- A module can import functionality from other modules.
Regards!
